A flat wall can quickly seem unfinished, even in a meticulously decorated interior. Conversely, understanding how to install a 3D wall panel allows you to create a sculptural, luminous, and significantly more refined surface in just a few hours, without undertaking major construction work.
How to install a 3D wall panel without compromising the final result
Success is not just about the moment of gluing. It starts much earlier, with the choice of wall, surface preparation, and anticipating cuts. A plaster 3D panel brings relief, depth, and an architectural presence very different from a simple decorative covering. But this elegance requires a clean, regular installation, considered as a whole.
The first point to check is the nature of the support. The wall must be sound, dry, clean, and stable. Peeling paint, a powdery coating, or an uneven surface will compromise adhesion. If the support has significant defects, it is better to correct them before installation. On a slightly imperfect wall, the panels can visually compensate for some small irregularities. However, on a warped or friable wall, even the most beautiful pattern will lose precision.
The choice of location also matters. A headboard, a living room wall, an entryway, or an office background are often the most enhancing areas. In a humid room, more attention must be paid to ventilation and the chosen finish. The plaster 3D wall panel favors well-maintained, calm, and well-prepared interiors.
Equipment to plan before installing 3D wall panels
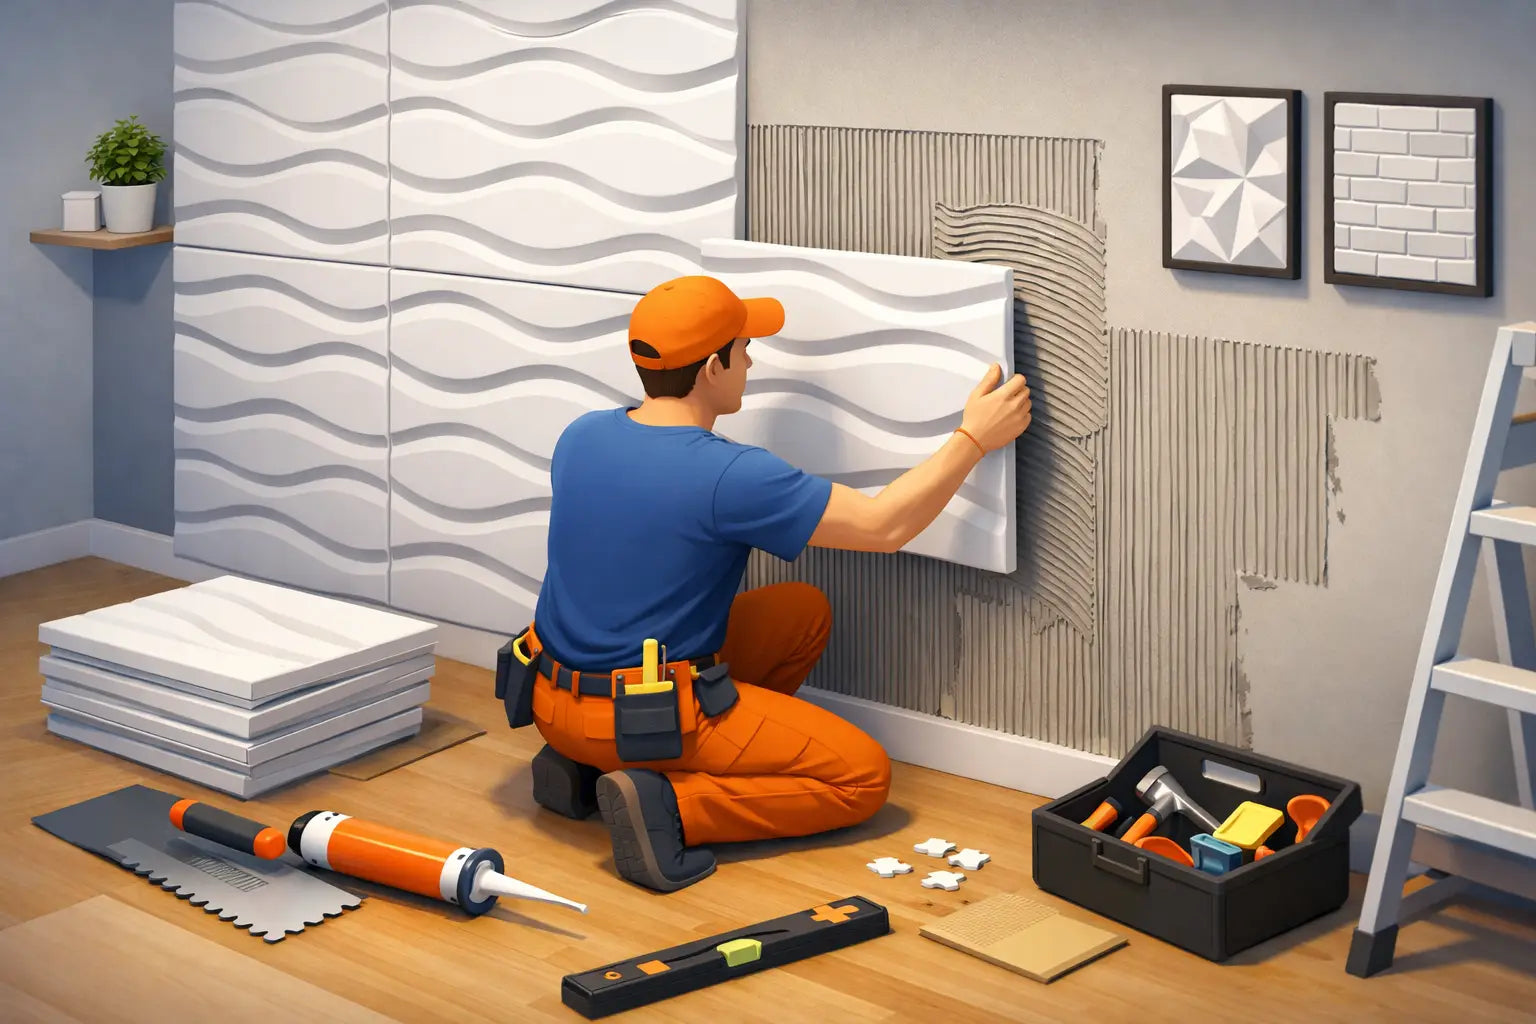
Before starting, you need to gather the right tools. This step seems simple, but it avoids interruptions and, above all, approximations. To install 3D wall panels under good conditions, plan for plaster-appropriate adhesive, a tape measure, a level, a ruler, a pencil, a spatula, a fine saw or appropriate cutting tool, fine sandpaper, as well as a finishing compound for joints if a perfectly continuous look is desired.
Depending on the project, a primer and paint will also be necessary. This is one of the great advantages of this type of covering: the surface is generally ready to be customized. Matte white for a gallery atmosphere, a mineral tone for an architectural effect, a strong hue to accentuate shadows – everything depends on the desired ambiance.
If you are working on a geometric or repetitive pattern, allow for extra layout time. Panels with marked lines or continuous waves require more vigilance with alignment. On a more organic model, a slight tolerance can be visually more discreet.
Prepare the wall and mark your guides
Installation begins with a perfectly cleaned surface. Dust, wash if necessary, then let dry. If the wall is very absorbent or has irregular porosity, an adhesion primer can secure the entire surface. This precaution is particularly useful on an old support.
Next, mark your guides. This is often the step that individuals neglect, even though it determines the visual balance of the wall. A logical starting point must be defined. Depending on the configuration, you either start from the center to achieve elegant symmetry, or from a perfectly straight corner if the wall is simple and the final cuts will be barely visible.
With a level, draw a horizontal reference line and, if necessary, a vertical line. These axes will guide the first row. In this type of installation, the first row conditions all subsequent ones. A slightly inclined start becomes very visible as the pattern repeats.
How to install a 3D wall panel step by step
Before gluing, dry-fit several panels. This check allows you to understand the direction of the pattern, anticipate joints, and identify cutting areas. On some designs, flipping a panel or shifting the reading of the relief can disrupt the overall harmony. It is therefore necessary to visualize the complete wall before final attachment.
Then apply the adhesive to the back of the panel, evenly, without overloading. A balanced distribution is preferable to a few too-thick blobs. Place the panel on the wall following your marks, then press firmly. The level must be checked immediately. As long as the adhesive has not set, small adjustments are still possible.
Continue panel after panel, paying attention to the junctions. On a high-end 3D covering, the desired effect is continuous, almost sculpted into the mass. The edges must therefore meet cleanly, without visible gaps or overlaps. If a slight gap appears, it can be corrected later, but it is better to aim for precision from the start.
Cuts are made as you go, especially around the perimeter, near corners, outlets, switches, or uneven ceilings. Measure twice before cutting. On a plaster panel, a clean cut greatly simplifies finishing. Do not force or abruptly break the material.
For large surfaces, proceed in coherent zones rather than too quickly. Installing a complete wall requires regularity, not haste. This is particularly true for models with deep reliefs, where light emphasizes every shift.
Joints, finishing, and painting
Once the panels are in place and the adhesive is dry, comes the phase that transforms a correct installation into a truly premium result. If the model and desired finish allow, fill micro-joints with a fine compound. Work with precision, then lightly sand after drying to smooth the joints without crushing the relief.
This step depends on the desired style. Some prefer to maintain a slight rhythm between the panels, especially on very elaborate modules. Others want a monolithic, more architectural effect. There is no single good method – there is the result that best serves your interior.
Before painting, dust carefully. Then apply a suitable primer, followed by the chosen finish. A matte paint often better highlights shadows and volumes. A too-glossy finish can harden the reading of the pattern or reveal joints. For an elegant and timeless interior, mineral tones, sand, off-white, or soft gray remain safe bets.
The most common mistakes to avoid
The first mistake is to install on a poorly prepared wall. Even a high-quality panel does not compensate for an unstable support. The second is to neglect the starting lines. An alignment defect of a few millimeters seems minor at first, then becomes obvious across the entire width of the wall.
Another sensitive point: the management of corners and electrical outlets. These areas require precision. An approximate cut immediately catches the eye, especially on a decorative wall designed as a centerpiece.
You should also avoid overdoing it. A 3D wall panel has a real presence. On all walls of a room, the effect can become heavy. Often, a single well-chosen section is enough to transform the space with much more elegance. It is this restraint that gives the relief its full value.
DIY installation or hiring a professional
The answer depends on the wall, the pattern, and your level of expectation. On a simple surface, with few cuts and an easy-to-join model, a careful amateur can achieve a very beautiful result. This is one of the attractions of these panels: offering a strong visual impact with accessible implementation.
However, for a large reception wall, a project with integrated lighting, or an installation in a high-end space where every detail counts, the intervention of a professional may be wise. The difference is often seen in the finishes, the regularity of the joints, and the quality of the peripheral cuts.
For a more ambitious residential or decorative project, it is relevant to choose panels designed to combine style and ease of installation. This is precisely the approach proposed by EFFET MARBELLA, with collections designed to bring character, depth, and a durable finish to contemporary interiors.
What a 3D wall panel really changes in a room
Installation is not just a technical matter. It modifies the perception of volume, the way light circulates, and even the feeling of comfort. A textured wall gives visual structure to the room. It dresses without cluttering, adds rhythm without adding furniture, and creates an immediately readable focal point.
In a living room, it advantageously replaces a simple painted wall. In a bedroom, it adds an enveloping softness, especially behind the headboard. In an office or reception area, it reinforces the impression of an interior signature. And when the surface is carefully painted, the result remains both contemporary and durable, far from fleeting trends.
Knowing how to install a 3D wall panel is therefore much more than learning a gluing method. It is choosing a more architectural way of treating the wall, with this simple but strong idea: an elegant interior often relies on the surfaces you finally decide to highlight.


