
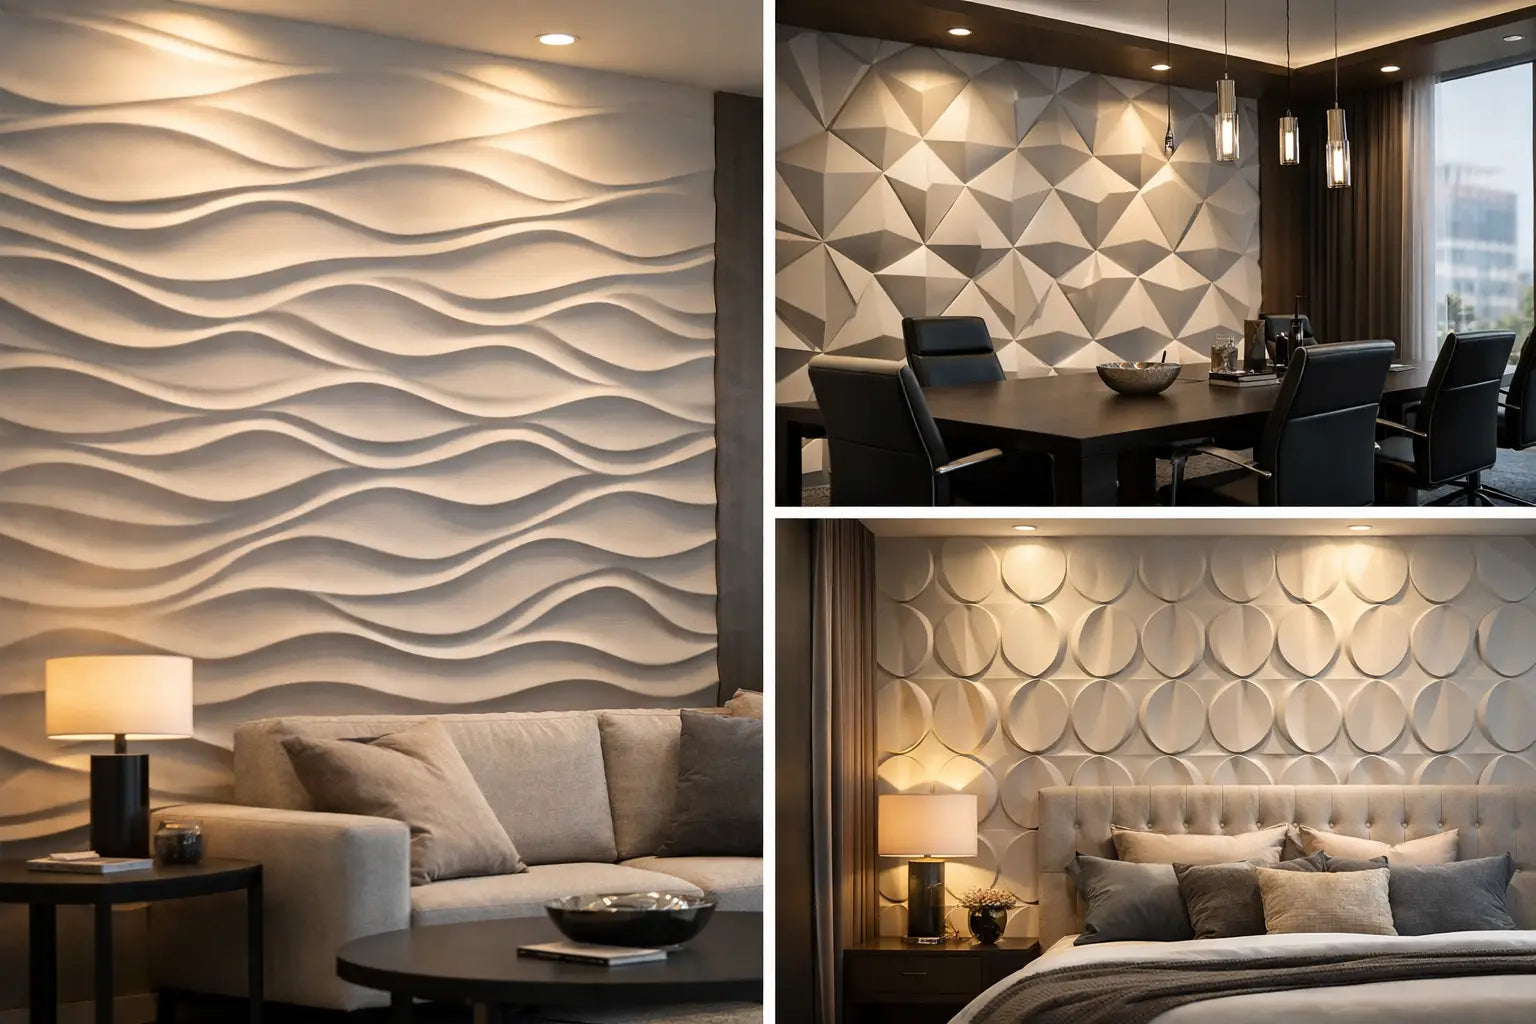
A wall lit from its own relief doesn't just decorate a room: it gives it depth, presence and atmosphere. This guide to interior LED wall panels helps you make the right choices before transforming a living room, bedroom, entrance hall or professional space. The aim is not to add light everywhere, but to create a refined setting where lighting reveals the material.
Why combine wall relief and LED lighting?
A 3D wall panel naturally captures light. Its hollows, lines and volumes create shadows that evolve throughout the day. The integration of an LED strip extends this effect once natural light has disappeared: the wall becomes an architectural element in its own right.
In an interior with smooth surfaces, this combination immediately adds character without weighing down the furniture. A geometric pattern can structure a TV wall, a wave can soften a bedroom, while a vertical relief elegantly accompanies a staircase. The LED should not compete with the panel: it should highlight its design with indirect, soft and controlled light.
It's also an interesting solution for delimiting spaces in an open-plan room. Behind a sofa, in a dining room or in a reception area, a sculpted, backlit wall creates a clear focal point, without the need for an additional partition.
Choosing the right location for your LED panels
Not all walls require the same treatment. An LED panel is particularly effective on a wall that can be seen when entering the room or from the main seating area. In a living room, the wall behind the television is a natural choice, provided that the light remains indirect to avoid reflections on the screen. Behind a headboard, panels can replace traditional wall lights and create a more enveloping atmosphere.
A narrow entrance often benefits from a vertical motif accompanied by a discreet luminous line: the eye is drawn upwards and the space seems more elongated. In a dining room, a panel placed behind a buffet or table creates a warm setting for meals and receptions.
Restraint is essential. An illuminated relief on every wall risks reducing the strength of the whole. It's better to choose a signature wall, then let the other surfaces breathe with a harmonious shade, a matt paint or a more sober covering.
Adapting the relief to the proportions of the room
Patterns with large undulations or marked geometric shapes find their place on a clear wall, where their rhythm can be appreciated from a distance. In a small room, a finer relief or a partial composition often gives a more elegant result. The panel should not overwhelm the space: it should reveal its proportions.
Also observe the fixed elements. A door, a window, a radiator or a bookcase can interrupt the design. It is possible to integrate them, but the layout must be prepared before ordering and before any cutting. In a custom project, a few precise measurements avoid visually unbalanced joints.
Interior LED wall panel guide: what light to choose?
Colour temperature profoundly changes the perception of relief. Warm light, around 2700 to 3000 K, is suitable for bedrooms, living rooms and comfort areas. It gently accentuates shadows and naturally complements wood, textiles and beige, sand or terracotta tones.
Neutral light, close to 4000 K, provides a more precise reading of the lines. It can be suitable for a hall, a contemporary office or a commercial project where a more graphic expression is sought. Very cold light is rarely the most flattering for a residential decorative panel: it can harden the material and make the atmosphere less inviting.
Intensity matters as much as colour. A strip that is too powerful creates visible light points and erases the subtlety of the volumes. Opt for a homogeneous diffusion, ideally concealed in a suitable profile, with a dimmer. Being able to modulate the lighting allows you to switch from a decorative presence during the day to a subdued atmosphere in the evening.
For a consistent result, avoid mixing opposite colour temperatures in the same room. If the suspensions are warm, the LED wall should generally be warm too. This luminous continuity gives the interior a more thoughtful, calmer and more upscale finish.
3D plaster: a durable and customizable base
3D plaster wall panels offer a quality of relief that flat imitations struggle to reproduce. Their mineral surface provides an authentic material feel and can be painted to integrate into a very personal palette. Timeless white, tone-on-tone with the wall, deep grey or a more assertive shade: the colour modifies the reading of the design and the effect of the light.
White is particularly interesting when you want to make the relief the star. The shadows generated by the LEDs then draw the pattern without visual overload. A coloured finish can, on the other hand, create a more theatrical decor, particularly in an entrance or behind a bar. Matt or velvety paints are often the most suitable, as they limit parasitic reflections.
Beyond aesthetics, a relief wall covering can contribute to the comfort of a room. Depending on the composition of the wall and the installation conditions, it contributes to an additional sensation of thermal and acoustic insulation. It does not replace technical insulation when necessary, but it adds appreciable thickness and material presence in a renovation project.
Preparing the project before installation
Success is determined before the first panel. Start by measuring the entire wall, then identify sockets, switches, electrical outlets and obstacles. Draw the layout of the pattern, even simply, to identify the cuts on the periphery and ensure that the lines remain balanced.
Cable routing must be anticipated. Power supply and electrical connections must remain accessible when necessary, while being invisible once the wall is finished. For this part, the intervention of an electrician is highly recommended, especially if a new circuit needs to be created, a dimmer installed or work carried out near existing elements.
The support must be clean, dry, stable and flat. On a very uneven wall, prior preparation is essential to maintain the alignment of the panels. Use an adhesive compatible with the support and the material, then regularly check the plumb and level during installation. A slight initial offset is much more noticeable on a repetitive pattern.
Planning luminous finishes
LED profiles, diffusers and finishing angles deserve the same attention as the panels themselves. A directly exposed strip can produce a discontinuous light line or reveal the diodes. A quality diffuser, on the other hand, creates a uniform halo and protects the installation.
Before final gluing, perform a lighting test. Turn on the LEDs in a darkened room and observe how the light hits the relief. This is the time to adjust the position of the profile, the intensity or the colour temperature. This simple step avoids regrets when the wall is already finished.
Errors that weaken the decorative effect
The first mistake is to choose a panel based solely on a photo, without taking into account the size of the wall and the orientation of the light. A spectacular pattern in a large room can become too present in a hallway. Conversely, a very discreet relief risks disappearing on a large or poorly lit wall.
The second is to treat the LED as a simple light strip. Successful integration requires thinking about diffusion, connections, power supplies and control. Technical details are not secondary: they ensure the sharpness of the result and ease of use on a daily basis.
Finally, avoid multiplying colours, patterns and decorative light sources around the same wall. A sculptural panel works best when it has a simple visual frame. A few well-chosen materials - wood, stone, brushed metal, textile - are enough to support its elegance.
Maintaining a relief LED wall
Maintenance remains simple. Regularly dust the reliefs with a soft duster or the brush attachment of a low-power vacuum cleaner. For a painted surface, a slightly damp cloth may be suitable if the finish allows it, without soaking the material or using abrasive products.
Periodically check that the light elements are working correctly and keep the references of your strip, its power supply and its dimmer. This precaution facilitates any subsequent replacement. With careful installation and suitable materials, a decorative wall becomes a durable element of the interior, rather than an ephemeral trend.
A beautiful LED project begins with a simple decision: choosing the wall that deserves to be looked at. Then, let the relief, the shade and a well-dosed light compose an interior signature that reflects you.


